Quick Start
This guide walks you from a fresh install to a running workspace using either the Devsy Desktop application or the Devsy CLI. Make sure you have installed Devsy on your system first.
Prerequisites
Devsy connects your local editor to the workspace, so install the IDE you plan to use:
- VS Code — download VS Code.
- VS Code Browser — no local install required; it opens in your browser.
- JetBrains (IntelliJ, GoLand, PyCharm, WebStorm, RustRover, RubyMine, CLion) — install a JetBrains IDE and JetBrains Gateway.
- SSH / Vim / Neovim — no local IDE required; you connect to the workspace over SSH.
Quick Start with Devsy Desktop
Add a Provider
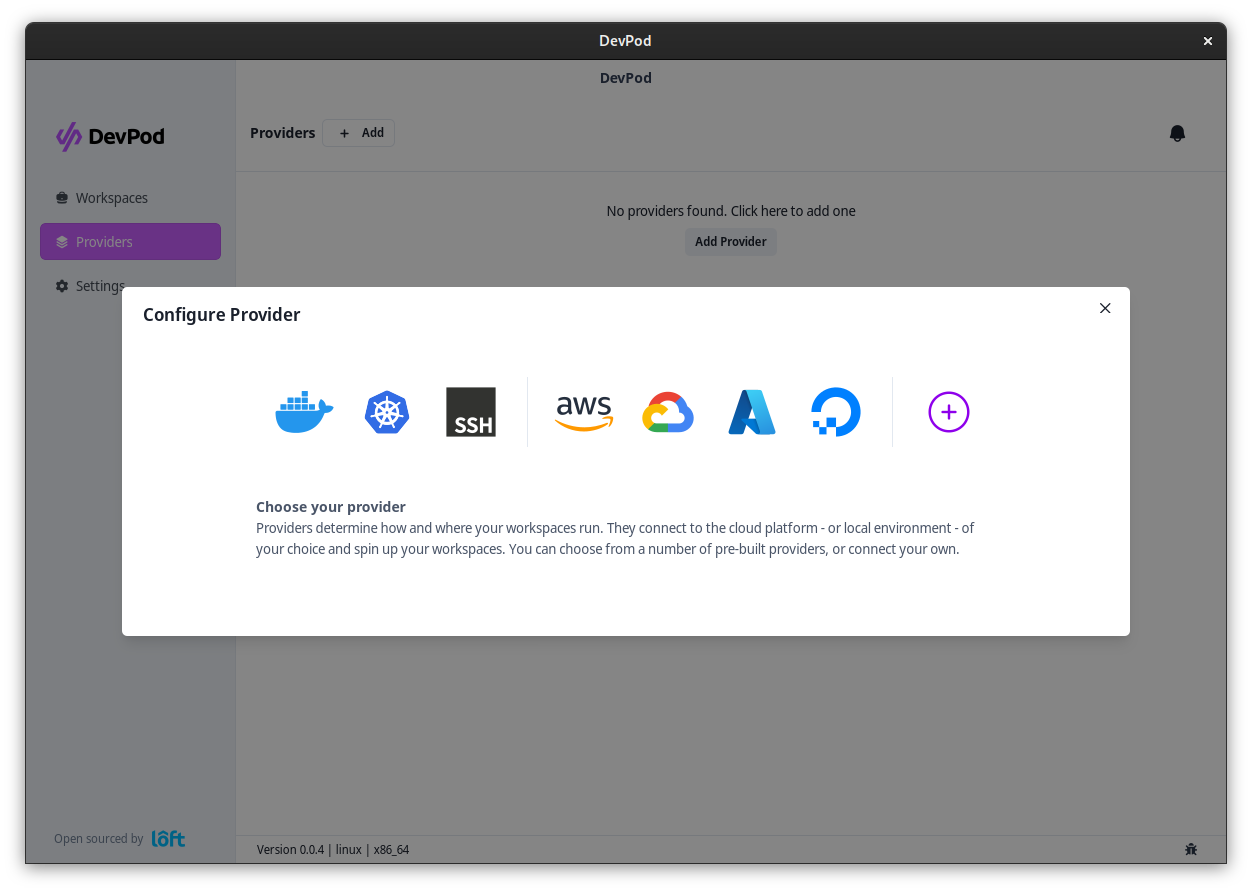
Add a provider via 'Providers' > '+ Add'. Select a provider and select 'Continue'.
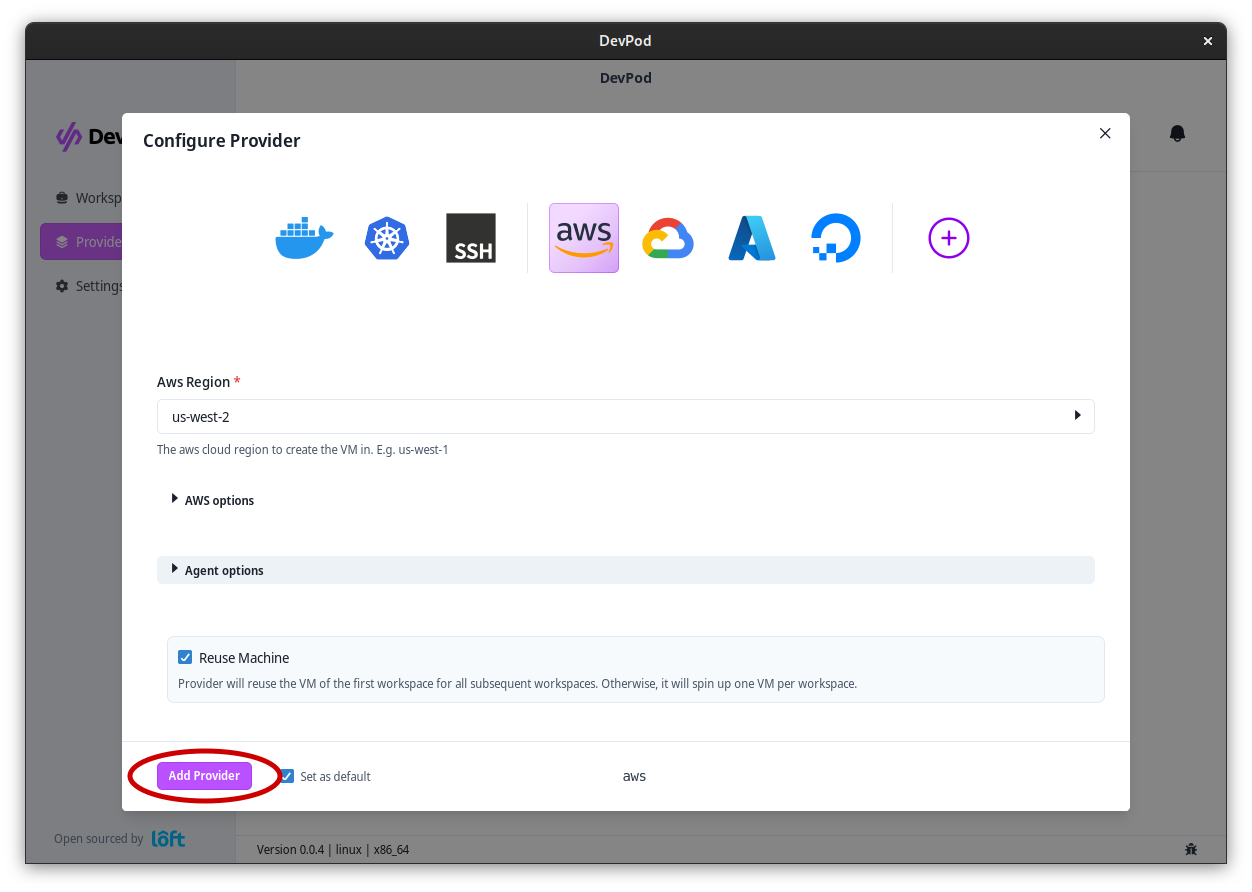
After selecting a provider, fill out the options (if necessary) and click on 'Add Provider'
Start a Workspace
Navigate to 'Workspaces' > '+ Create' to launch the workspace wizard. Step through:
- Provider – pick an initialized provider.
- Source – enter your project URL or choose one of the quickstart templates.
- IDE – pick how you want to open the workspace:
- VS Code – opens VS Code locally, connected to the dev container.
- VS Code Browser – opens VS Code in your browser, connected to the dev container.
- JetBrains – opens your chosen JetBrains IDE through JetBrains Gateway.
- None – skip opening an IDE and connect over SSH (use this for Vim/Neovim or a plain SSH session).
- Review – confirm the configuration.
- Launch – start the workspace.
The wizard streams logs as Devsy starts the workspace. Once it's ready, your chosen IDE opens connected to the dev container.
If you selected a JetBrains IDE, JetBrains Gateway opens automatically with a prefilled form for the workspace. Press Check Connection and Continue without changing any configuration to start the IDE inside the workspace.
Connect over SSH
If you selected None, connect to the workspace over SSH once it's running:
ssh WORKSPACE_NAME.devsy
Vim / Neovim
After connecting, you have two options to start coding in Vim/Neovim:
- Netrw/SCP — Vim/Neovim can edit remote files using Netrw. Connect from within Vim with
:e scp://[user@]machine[[:#]port]/path, or start Vim withvim scp://[user@]machine[[:#]port]/path. The Devsy logs give you the user/machine combination, usually in the formWORKSPACE_NAME.devsy. - Your Vim config in the workspace — because the target environment is a container, you can SSH in and install your Vim/Neovim configuration like you would on any new machine. Run the
ssh WORKSPACE_NAME.devsycommand Devsy prints after starting the workspace.
To use environment variables in your devcontainer.json — for example, for dynamic control over the container image version — see Environment variables in devcontainer.json.
Quick Start with the Devsy CLI
Make sure you have installed the Devsy CLI on your system.
Add a Provider
Add a provider (local Docker, for example):
devsy provider add docker
For more providers, take a look at Add a Devsy Provider.
Start a Workspace
Start a workspace, choosing how to open it with --ide:
# Start in VS Code browser
devsy workspace up github.com/microsoft/vscode-remote-try-node --ide openvscode

# Start in VS Code
devsy workspace up github.com/microsoft/vscode-remote-try-node --ide vscode

# Start without an IDE
devsy workspace up github.com/microsoft/vscode-remote-try-node --ide none
If you selected an IDE, it should open automatically. Otherwise, connect to the workspace manually:
ssh WORKSPACE_NAME.devsy